Getting Started
In order to familiarize yourself with the program, the best idea is to start with simulated data. In this way you avoid all the problems arising from interfacing with a real instrument and you can see the limitations of the program. The example config available on the repository is already configured to work with a simulated camera. It is recommended that you copy the contents of the file into a folder on your own computer.
Opening the Program
After installing_ PyNTA, you can trigger it from the command line. We are assuming that you are within the folder that
contains the configuration file and that its name is config.yml. To start the program, you simply type:
python -m pynta -c config.yml
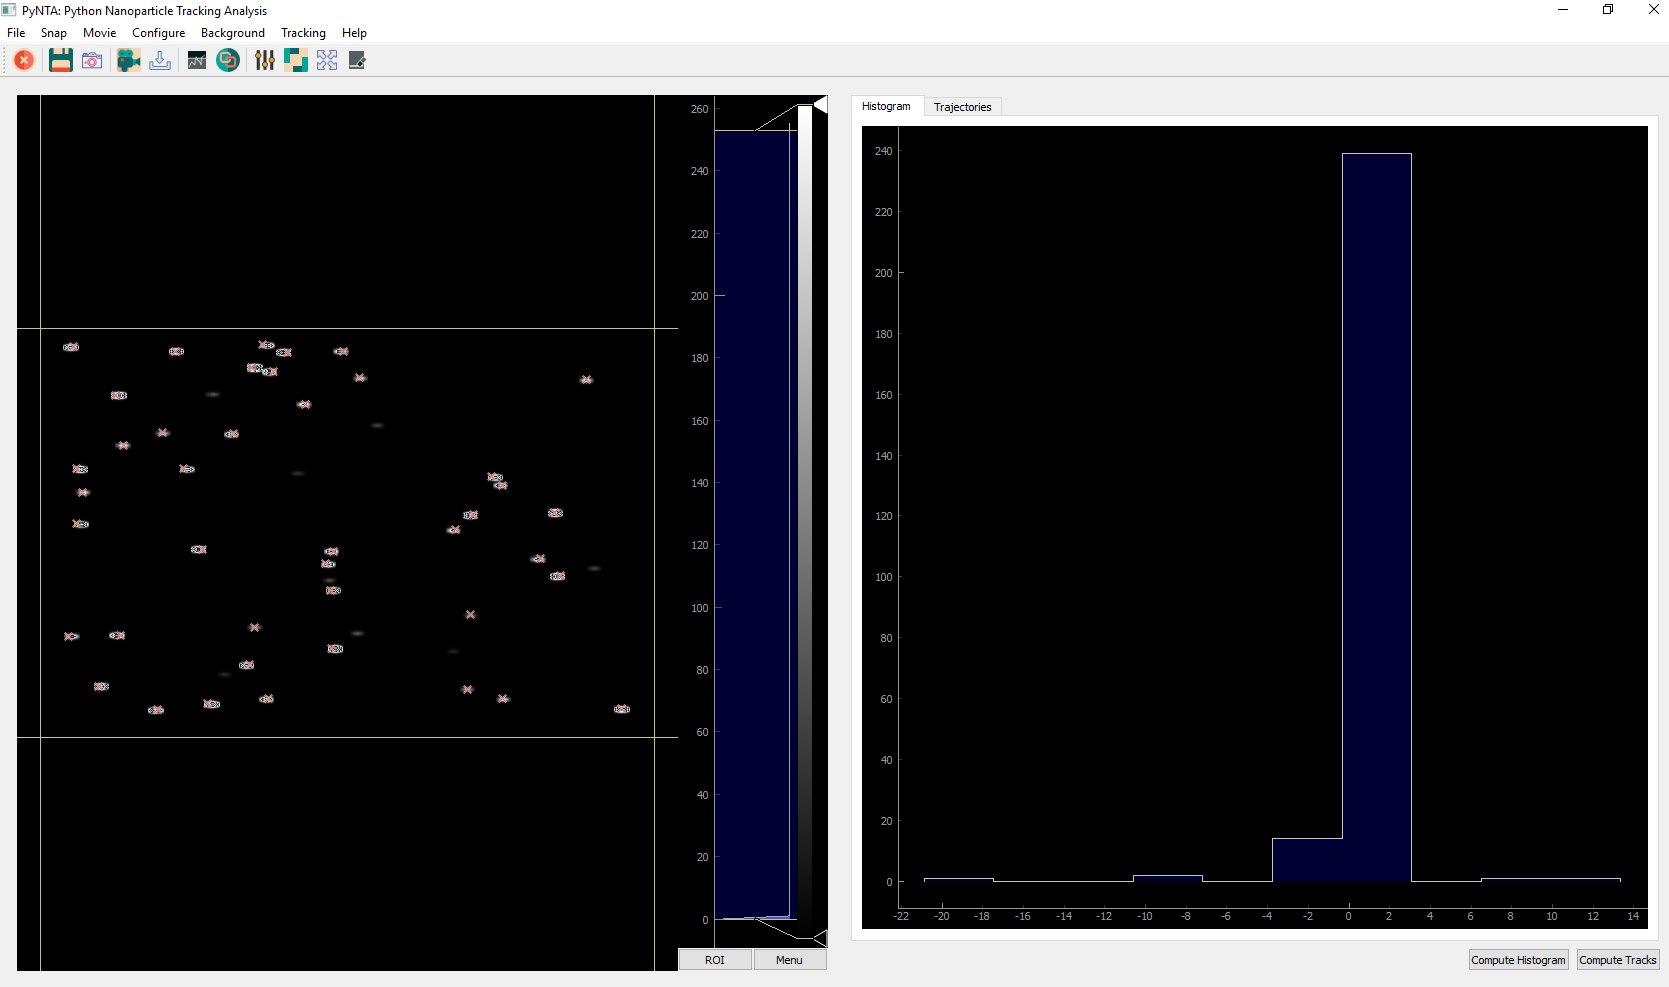
After a few moments, a screen like the one below will welcome you to the program.
The Tools
Most of the options were designed to be self-explanatory. However it is important to give a short discussion in order to speed the introduction to the tool. After initializing, normally one would like to snap a photo in order to see what is being recorded by the camera. You can achieve it by clicking the button as shown in the image below:
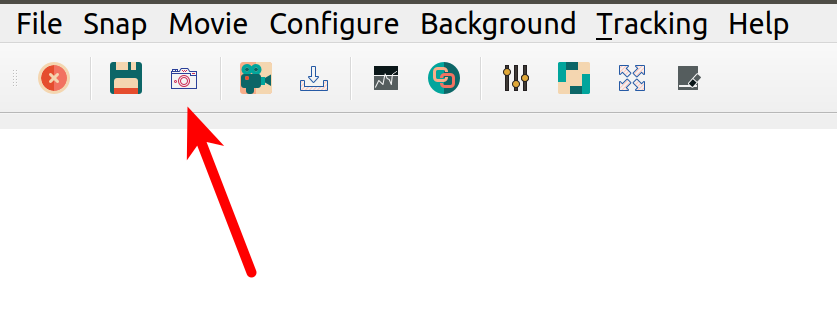
This will record a single image from the camera and will be displayed on the space right below:
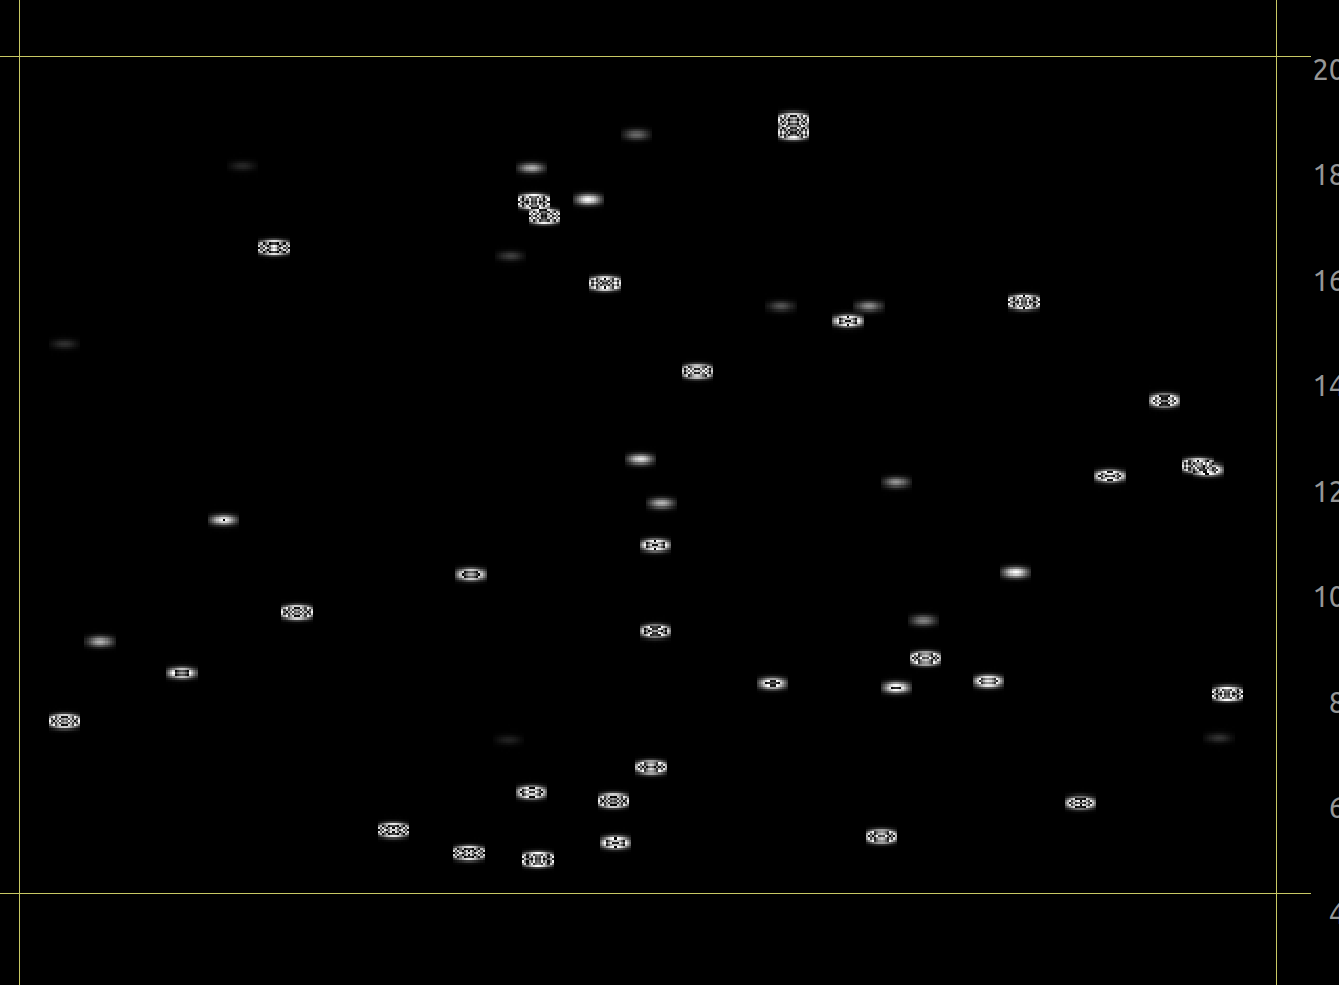
The image can be zoomed-in and out by scrolling with the central wheel of the mouse. Dragging allows to move around the image. In order to return to the full view, it is possible to right-click on the image and select View All. The histogram on the right of the image shows the levels for displaying. You can adjust the minimum and maximum as well as the color scale. Right clicking on the image allows you to do an Auto Range, i.e. to adjust the levels such that the maximum and minimum correspond to those of the data being displayed.
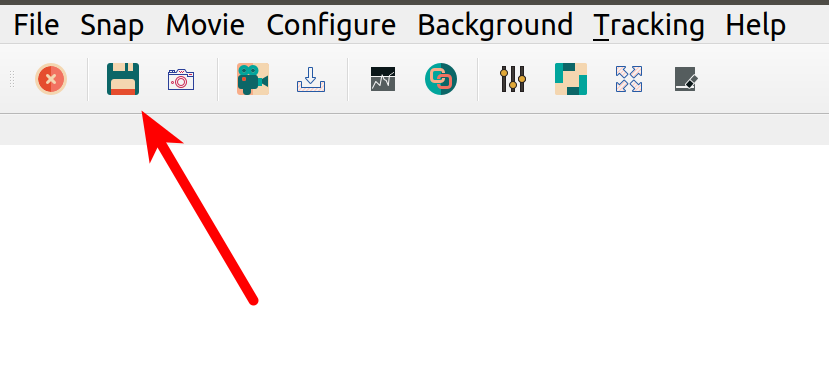
If you want to save the image you can click on the icon for saving, as shown below:
PyNTA also allows you to acquire continuous images, by clicking on the icon highlighted below. The exact behaviour will depend on the camera employed. For example, if a frame-grabber is available, the exact timing between frames can be guaranteed. Cameras without a buffer, however, will have a timing that depends on the computer ability to read from them. The communication with the camera happens in a separate thread, trying to guarantee the maximum reliability of the timing.
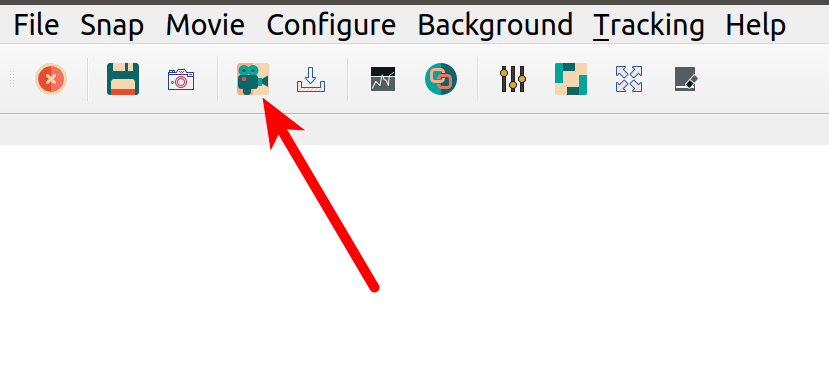
Another feature is the continuous saves option, which is right next to the start movie button. The continuous saves streams all the available frames to a file on the hard rive. The location of the file is determined in the config file or, as we will see later, can be set in the configuration on the User Interface. In case of acquiring at high frame rates, not all frames are displayed to the user, but all of them will be saved.
Tracking and Linking
The feature that really makes PyNTA unique is the ability to identify and track nanoparticles on a video in real time.
The procedure for tracking and analysis requires of two steps. First, you have to start identifying the particles, with
the button called start tracking. You will see red crosses appearing on the particles in the image. It takes a few instants to setup the linking procedure, during which the movie may seem to freeze.
If you are satisfied with how the identification of particles works, you can start linking the positions. Linking is a procedure that identifies whether locations in consecutive frames belong to the same particle or not. This procedure can be computationally expensive and requires fine tuning of the parameters. Linking also happens in a separate process, and in parallel to the acquisition and identification of particles.